Table of Contents
Break-In Bullwhip Guide
How to Properly Handle a New Bullwhip
Why Are New Bullwhips Stiff?
The Importance of the Break-In Process
What to Avoid With a New Bullwhip
Different Methods for Breaking in a Bullwhip
How to Crack a Bullwhip for Beginners
Factors That Affect the Break-In Process
Experience Improves the Break-In Process
Conclusion: Patience and Practice Lead to Mastery
FAQs About Bullwhip Break-In and Usage
How to Break-In a Bullwhip and Master Whip Cracking
How to properly Handle a New Bullwhip
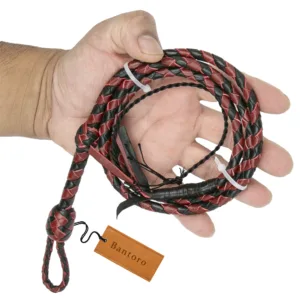
At Bantoro, we understand the excitement of receiving a new bullwhip. Whether you’re a seasoned enthusiast or a beginner, it’s important to know that all new whips, regardless of material, plait count, or length, are inherently stiff. This stiffness isn’t a flaw but a characteristic of a freshly crafted whip. Proper care and a structured break-in process are essential to ensure your whip performs at its best over time. This beginner’s guide explains how to use a bullwhip, how to crack a bullwhip, and how to break in a new bullwhip safely for better control and performance.
Why Are New Bullwhips Stiff?
When a bullwhip is newly made, the materials used in its construction—whether leather, kangaroo hide, or synthetic—haven’t yet been fully conditioned through use. This stiffness occurs because the tightly woven layers (plaits) haven’t had time to settle into their intended shape. The braiding needs to soften gradually to allow the whip to flow and crack efficiently. This natural process takes time and handling to achieve optimal flexibility and responsiveness.
The Importance of the Break-In Bullwhip Process
Breaking in a new bullwhip is crucial for both the longevity of the whip and your ease of use. Just like breaking in a pair of leather boots, the whip needs to become accustomed to movement and develop its natural shape. Skipping this process or rushing it can cause damage, reducing the lifespan and effectiveness of the whip. By properly breaking in your whip, you not only extend its durability but also improve its performance, allowing it to crack more smoothly with less effort.
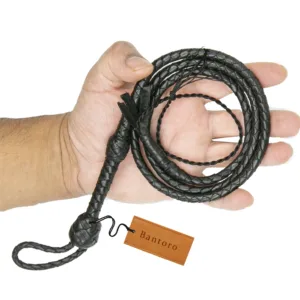
Black Leather Mini Whip 3ft (91cm) – Braided Pocket Bullwhip for Cracking Practice
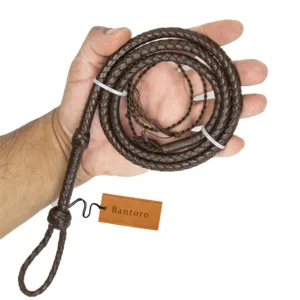
£22.99Original price was: £22.99.£19.99Current price is: £19.99. Add to cartAdd to WishlistAdd to WishlistBrown Leather Mini Whip – 3ft Pocket Size Braided Whip for Cracking Practice
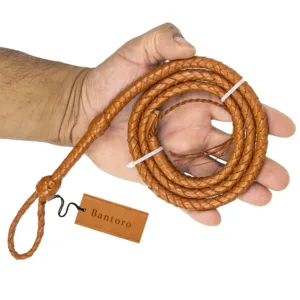
£22.99Original price was: £22.99.£19.99Current price is: £19.99. Add to cartAdd to WishlistAdd to WishlistTan Leather Mini Whip 3 Feet – 6 Plait Mini Bullwhip Loud Cracking Pocket Size
£22.99Original price was: £22.99.£19.99Current price is: £19.99. Add to cartAdd to WishlistAdd to WishlistBlack & Red Leather Mini Whip – 3 Feet, Pocket Size, Loud Cracking Bullwhip
£22.99Original price was: £22.99.£19.99Current price is: £19.99. Add to cartAdd to WishlistAdd to Wishlist
What to Avoid With a New Bullwhip

While it might be tempting to test out the full power of your new whip immediately, it’s essential to avoid a few common mistakes during the break-in process:
Avoid Excessive Force: It’s important not to use excessive force or attempt powerful cracks right out of the box. This can cause unnecessary strain on the stiff fibers, leading to potential damage or premature wear.
Avoid Abrasive Surfaces: Don’t use your whip on rough or abrasive surfaces, such as concrete or gravel. The abrasive texture can wear down the whip’s material and cause premature fraying, particularly at the fall or cracker.
Don’t Overbend: Trying to force flexibility by overbending or sharply coiling a stiff whip will likely damage its integrity. It’s better to let the whip soften naturally over time
Many beginners accidentally damage their whip early—here are the most common bullwhip mistakes to avoid.
Different Methods for Breaking in a Bullwhip
There are various methods for breaking in a new whip, and what works best can depend on the material, plait count, and length of the whip. Here’s a general guide to get you started, but remember: there’s no single “right” way, and with experience, you’ll develop your own preferred technique.
Light Cracking Sessions: One of the most common methods to break in a whip is simply using it for light, controlled cracking over time. Start with basic cracks to gradually loosen the plaits and promote flexibility. Perform these sessions on a soft surface, like grass or dirt, to avoid damage.
Massage and Conditioning: For leather whips, gently massaging the whip with your hands helps loosen the fibers. You can also use a specialized leather conditioner to soften the material slightly, but be cautious not to overdo it—leather can become too supple, losing its firmness and shape.
Hanging: Hanging the whip for extended periods helps it to naturally stretch out and soften under its own weight. This method is particularly useful for longer whips or those made of heavier materials.
Rolling the Whip: Some users find that rolling the whip in their hands or using it to perform slow, smooth loops helps to break in the plaits without applying unnecessary force. This method can be especially useful for whips made of synthetic materials that don’t respond as well to traditional conditioning methods.
How to Crack a Bullwhip for Beginners
Beginner bullwhip cracking starts with controlled movements rather than power. Hold the whip firmly, extend your arm forward, and create a smooth wave motion through the whip. As the loop travels to the tip, the cracker accelerates and produces the loud cracking sound.
Start with simple techniques such as the forward crack or cattleman’s crack. Practicing slowly helps the whip loosen naturally during the break-in process while improving your control and accuracy.
Factors That Affect the Break-In Process
No two whips will break in exactly the same way. The following factors will influence the time and techniques required for optimal softening:
Whip Material: Leather, kangaroo hide, and synthetic whips all have different properties. Leather requires more care and conditioning, while synthetic whips may only need light cracking and handling to break in properly.
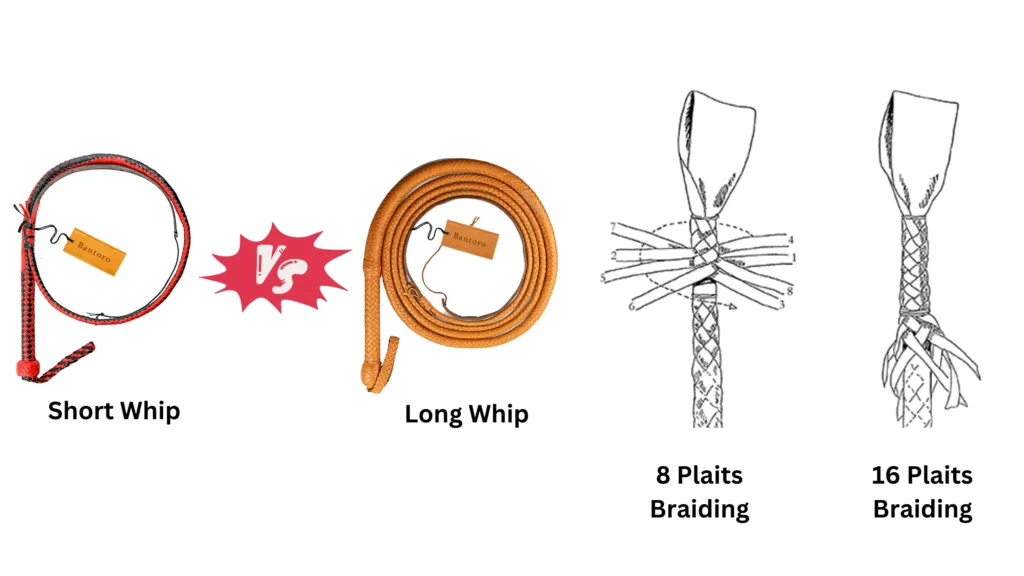
Braiding Plaits: Whips with a higher number of plaits are generally more flexible right out of the box; however, they may still require some time to settle. Lower-plait whips are stiffer and require a longer break-in period. If you’re unsure how plait count affects flexibility, see our comparison of 16 plait vs 12 plait bullwhips.
Length of the Whip: A longer whip will take more time and effort to break in due to the additional material. Shorter whips can often be more rigid, requiring a more delicate and patient approach.
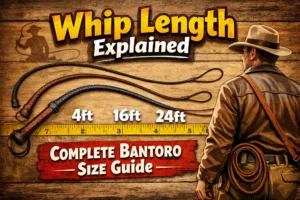
Best Bullwhip for Beginners (Length, Type & Material)
Choosing the right bullwhip is important for beginners who are learning how to break in and use a whip properly. The best bullwhip for beginners is typically shorter in length, easier to control, and made from durable materials.
For most beginners, a bullwhip between 4ft and 6ft offers the best balance between control and performance. Shorter bullwhips are easier to handle and reduce the risk of mistakes during practice, while still producing strong cracking sounds.
Material also plays an important role. Leather bullwhips, especially cowhide or kangaroo leather, provide better flexibility and durability over time. Beginners often prefer leather whips because they break in naturally with use and offer better feedback during cracking practice.
If you’re just starting out, choosing a well-balanced bullwhip designed for beginners can make the break-in process easier and improve your overall whip handling skills.
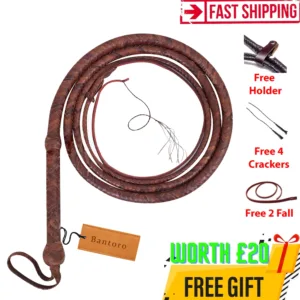
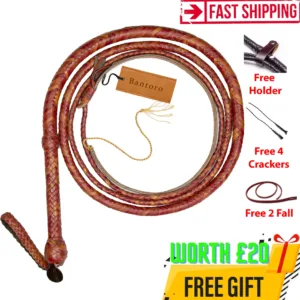
If you’re looking for a beginner-friendly whip to practice safely, explore our handcrafted leather bullwhips collection designed for durability and controlled cracking.
- Leather Bullwhips
- Paracord Bullwhips
- Short bull Whips
- Long bullwhips
- 16 Plaits braiding bullwhips
- 12 Plaits braiding bullwhips
To explore different whip variations and their uses, read our guide on the top bullwhip styles.
Brown Kangaroo Leather Bullwhip – 16 Plaits Professional Standard (Indiana Jones Style)
£59.00 – £144.00Price range: £59.00 through £144.00 Select options This product has multiple variants. The options may be chosen on the product pageAdd to WishlistAdd to WishlistBrown Kangaroo Leather Bullwhip (4ft – 24ft) | Loud Crack | 16 Plait | Equestrian | Free Extras
£59.00 – £144.00Price range: £59.00 through £144.00 Select options This product has multiple variants. The options may be chosen on the product pageAdd to WishlistAdd to WishlistKangaroo Leather Snake Whip – 16 Plait Bullwhip Premium Red Multi‐Shade
£76.00 – £96.00Price range: £76.00 through £96.00 Select options This product has multiple variants. The options may be chosen on the product pageAdd to WishlistAdd to WishlistRed Black Kangaroo Leather Bullwhip – 16 Plaits, Leather Handle & Bolster Professional
£59.00 – £144.00Price range: £59.00 through £144.00 Select options This product has multiple variants. The options may be chosen on the product pageAdd to WishlistAdd to Wishlist

Experience Improves the Break-In Process
As you gain more experience with bullwhips, you’ll develop an intuition for how to break them in efficiently. The process becomes easier with time, and you’ll discover which techniques work best for your specific whip style and material. Remember, there’s no rush in the break-in process—it’s a journey that improves with experience and practice.
By understanding the reasons behind the whip’s stiffness and following proper break-in methods, you’ll extend its lifespan and enhance your performance. Each whip is unique, and your personal experience will shape how you approach this important step. At Bantoro, we’re here to provide high-quality whips that you can trust for both durability and performance, and we encourage you to embrace the art of whip handling with patience and care.
Black Paracord Nylon Bullwhip – 16 Plaits Professional Standard – Multiple Sizes
£59.00 – £144.00Price range: £59.00 through £144.00 Select options This product has multiple variants. The options may be chosen on the product pageAdd to WishlistAdd to WishlistBrown And Beige Paracord Bullwhip – 16 Plait Nylon, Loud Crack Professional Whip
£59.00 – £85.00Price range: £59.00 through £85.00 Select options This product has multiple variants. The options may be chosen on the product pageAdd to WishlistAdd to WishlistParacord Nylon Bullwhip In Black And Orange Color – 4 to 10 feet – Professional Quality Whip
£59.00 – £85.00Price range: £59.00 through £85.00 Select options This product has multiple variants. The options may be chosen on the product pageAdd to WishlistAdd to WishlistBlack and Green Paracord Bullwhip – 16 Plait Leather Belly, Loud Cracking Nylon Whip
£59.00 – £144.00Price range: £59.00 through £144.00 Select options This product has multiple variants. The options may be chosen on the product pageAdd to WishlistAdd to Wishlist


Conclusion: Patience and Practice Lead to Mastery
Breaking in a new bullwhip is an essential process that should never be rushed. By understanding the reasons behind the whip’s stiffness and following proper break-in methods, you’ll extend its lifespan and enhance your performance. Each whip is unique, and your personal experience will shape how you approach this important step. At Bantoro, we’re here to provide high-quality whips that you can trust for both durability and performance, and we encourage you to embrace the art of whip handling with patience and care.
Ready to start practicing? Browse our premium leather bullwhips designed for beginners and professionals to experience smooth cracking and long-lasting performance.
FAQs About Break-in Bullwhip / Mastering Your Whip
Q1: Why does a bullwhip crack?
A: A bullwhip cracks because its tip breaks the sound barrier, creating a small sonic boom.
Q2: How to continuously crack a whip?
A: Use fluid, rhythmic arm and wrist motions while maintaining tension and timing to keep the whip moving efficiently.
Q3: What is the end of a bullwhip called?
The end of a bullwhip is called the cracker or popper. It is the thin strand that creates the cracking sound during use.
Q4: What is the best length for a cracking bullwhip?
A: The ideal length for cracking is typically 6 to 8 feet, offering control and a loud crack.
Q5: How long does it take to break in a bullwhip?
Breaking in a bullwhip can take several sessions of light practice. Most leather bullwhips gradually soften after regular cracking sessions and proper conditioning.
Q6: What length bullwhip is best for beginners?
Many beginners start with a bullwhip between 4ft and 6ft. Shorter whips are easier to control while still producing strong cracking sounds.